
Reel to Reel Blog

Professional Tape Production: What Defines It?

A reel of tape does not become professional simply because it is on a metal reel or carries a familiar studio name. Professional tape production is the disciplined match between tape formulation, machine format, operating level, recording speed, alignment, and handling. When those elements agree, analog tape can deliver stable frequency response, useful headroom, low noise, and recordings that remain practical to replay years later.

For engineers, archivists, and serious home recordists, that distinction matters. The wrong tape can create needless noise, poor high-frequency response, head clogging, shedding, or a recording level that never quite behaves. The right tape lets the machine do what it was designed to do.

Professional Tape Production Starts With the Format

Before choosing a brand or formulation, identify the recorder’s physical format. Tape width is not an accessory decision. It determines what the machine can accept, the track layout it uses, and often the application it was built for.

Quarter-inch tape is the familiar format for consumer and prosumer stereo decks, small studios, and many legacy master recordings. Half-inch tape is common in multitrack work, often providing 4-track or 8-track capability depending on the machine. One-inch and 2-inch tape belong to larger-format multitrack systems, where wider tracks support more channels and stronger signal-to-noise performance.

Track format matters just as much. A quarter-track stereo machine and a half-track stereo machine may both use 1/4-inch tape, but their recordings are not interchangeable in the way many newcomers expect. A half-track master played on a quarter-track deck can produce channel bleed and incorrect playback results. For archival work, identify the original width, track configuration, equalization standard, and speed before making any transfer or recording decision.

Reel size is a practical constraint rather than a sound-quality rating. A 7-inch reel is convenient for many home decks. A 10.5-inch NAB reel holds substantially more tape and is common in professional rooms, but it requires a machine with the proper hub adapters and motor torque. The larger reel does not make tape sound better. It simply supports longer running time and a more studio-oriented workflow.

Tape Formulation Sets the Operating Window

Professional recording tape is engineered around a target operating level. This is where tape selection becomes more technical than choosing between “vintage” and “new.” A higher-output formulation can accept more recorded level before distortion rises sharply, giving the engineer more headroom and a better signal-to-noise ratio. But that benefit only appears when the recorder is aligned for it.

Standard-output formulations are often the sensible choice for machines designed around older tape such as 3M 111, Scotch 150, or similar low-output stocks. High-output formulations, including tape families associated with Ampex/Quantegy 456, 499, and later modern equivalents, can perform exceptionally well on properly calibrated equipment. Put high-output tape on an uncalibrated deck, however, and the result may be excessive distortion, altered tonal balance, or misleading meter readings.

Bias is central to this relationship. During recording, the machine applies an ultrasonic bias signal to linearize the magnetic recording process. Different formulations need different bias settings for the best compromise between sensitivity, distortion, noise, and high-frequency extension. Equalization also matters. NAB and IEC playback curves are not interchangeable, especially when evaluating masters or making archival transfers.

This is why a tape box label is useful but not sufficient. A professional workflow records the tape type, speed, reference fluxivity, equalization, noise-reduction status, and any unusual machine setup. Those notes prevent expensive guesswork later.

High Output Is Not Always the Best Choice

It is tempting to assume that the highest-output tape is automatically superior. In actual use, the best choice depends on the machine and the job. A well-maintained vintage deck that is not routinely calibrated may deliver more predictable results with a formulation close to the stock it was designed to use. For speech, field recordings, or archival copies, absolute maximum level may matter less than stable handling and repeatable playback.

Conversely, a calibrated professional machine running at 15 or 30 ips can take real advantage of modern high-output tape. That combination is especially attractive for music production, mixdown masters, and other sessions where transient handling and low noise are priorities.

Speed Changes Both Sound and Cost

Tape speed affects fidelity, running time, and tape consumption. At higher speeds, more tape passes the heads every second. This generally improves high-frequency response and reduces the audibility of tape hiss. It also uses tape faster and can make low-frequency head bump more noticeable depending on the machine.

The most common professional speeds are 15 ips and 30 ips. Fifteen ips remains a respected all-around choice, balancing low noise, strong bass performance, and practical reel time. Thirty ips can extend high-frequency performance and reduce noise further, but it doubles tape usage and is not automatically better for every source. Some engineers prefer 15 ips for the low-end weight and saturation character it can provide.

Lower speeds such as 7.5 ips are capable of excellent work on a well-aligned deck and are widely used for home recording and playback. They are also common in legacy collections. The key is to avoid treating speed as a quality badge. Record and play back at the speed the project requires, and document it clearly.

Machine Condition Is Part of the Recording Chain

Even premium tape cannot compensate for dirty heads, worn guides, poor tension, or an out-of-spec transport. Professional tape production depends on mechanical condition as much as electronic alignment.

Clean the tape path before important recording or playback work. Heads, guides, capstan, and pinch roller surfaces should be free of oxide residue, adhesive deposits, and debris. Demagnetizing heads and metal tape-path components at appropriate intervals can reduce unwanted noise, although careless demagnetizing can do more harm than good. Follow the machine manufacturer’s procedure and keep the demagnetizer away from recorded tape.

Head wear deserves close attention. A worn head can cause reduced high-frequency response, uneven channel balance, and poor tape-to-head contact. Severe wear may call for relapping or replacement, especially on professional multitrack machines where alignment accuracy is critical.

For serious recording, calibration should not be a once-in-a-decade event. A proper setup typically includes checking playback level and equalization with a reference tape, then setting record bias, level, and equalization for the chosen formulation. If you change tape types, assume you may need to recalibrate. A few minutes spent confirming alignment is far less costly than discovering a full reel of compromised material after the session.

New, NOS, and Refurbished Tape Serve Different Needs

Current-production tape offers consistency and is often the best choice for new recordings where predictable performance is essential. It is the straightforward option for sessions, mixdowns, and masters you expect to replay on a known machine.

NOS tape can be valuable, particularly when a project requires a discontinued formulation or period-correct stock. Still, age alone tells you very little. Storage history, binder condition, packaging integrity, and the specific tape family all affect usability. A sealed box is encouraging, not a laboratory report.

Refurbished tape has a legitimate place when it has been evaluated and prepared appropriately. It can be a practical solution for test recordings, rehearsals, noncritical projects, and users who need an economical supply of tape. Its suitability depends on the source stock and the quality of inspection. For an irreplaceable master, use tape with the highest confidence level available and verify performance before committing the project.

At Reel to Reel Warehouse, the point is not to force every customer into the same tape category. It is to help match the stock to the recorder, the budget, and the consequences of failure.

Storage and Documentation Protect the Work

A professionally made tape can still be lost to poor storage. Keep reels in their boxes, stored upright in a clean, stable environment away from heat, moisture, direct sunlight, and strong magnetic fields. Avoid attics, garages, damp basements, and vehicles where temperature swings are severe.

Wind also matters. After use, leave tape evenly wound and avoid loose, uneven packs. For long-term storage, a smooth tails-out wind is commonly preferred because any print-through tends to manifest as post-echo rather than pre-echo. The practical benefit is modest compared with good environmental control, but careful winding is part of sound tape handling.

Label every reel with the information a future user will need: tape formulation, width, track format, speed, equalization, date, recording level or alignment reference, and program details. If the reel has been baked, restored, or shows any known issue, say so. Clear labeling is one of the least expensive preservation tools available.

The strongest analog recordings are rarely the product of one premium purchase. They come from a compatible tape, a correctly maintained machine, and notes that make the reel intelligible long after the session lights go out.

What Archival Tape Recovery Can Still Save

A reel that has survived for 40, 50, or 60 years may still hold a perfectly usable recording. It may also be one play away from shedding oxide, snapping at a splice, or depositing residue across a tape path. Archival tape recovery is the careful work of determining which condition you have before the recording is put at risk.

For collectors, studios, families, and institutions, the goal is not to make an old tape look new. The goal is to preserve its content, document its condition, and make the safest possible transfer while retaining the original reel. That requires patience, the right machine, and a clear understanding of when to stop.

Start With the Recording, Not the Reel

An empty reel, leader, and box can usually be replaced. The sound recorded on the tape cannot. Before handling a collection, identify the tapes with the highest value: unique interviews, original session masters, radio airchecks, live performances, family recordings, production elements, or documents that have no known copy.

Next, create a basic inventory. Record the box label exactly as written, reel size, tape width, apparent brand, track format if known, speed markings, and any visible notes about noise reduction or equalization. Photograph labels, hubs, boxes, and damage before making changes. This is useful even for a personal collection. Once boxes are separated from reels or handwritten labels fade, important context can disappear quickly.

Do not assume that an unlabeled tape is disposable. A plain 7-inch reel may contain a home recording, but it may also be a safety copy, an edit reel, or an undocumented master. If the content is unknown, treat it as unique until proven otherwise.

Assess Tape Condition Before Playback

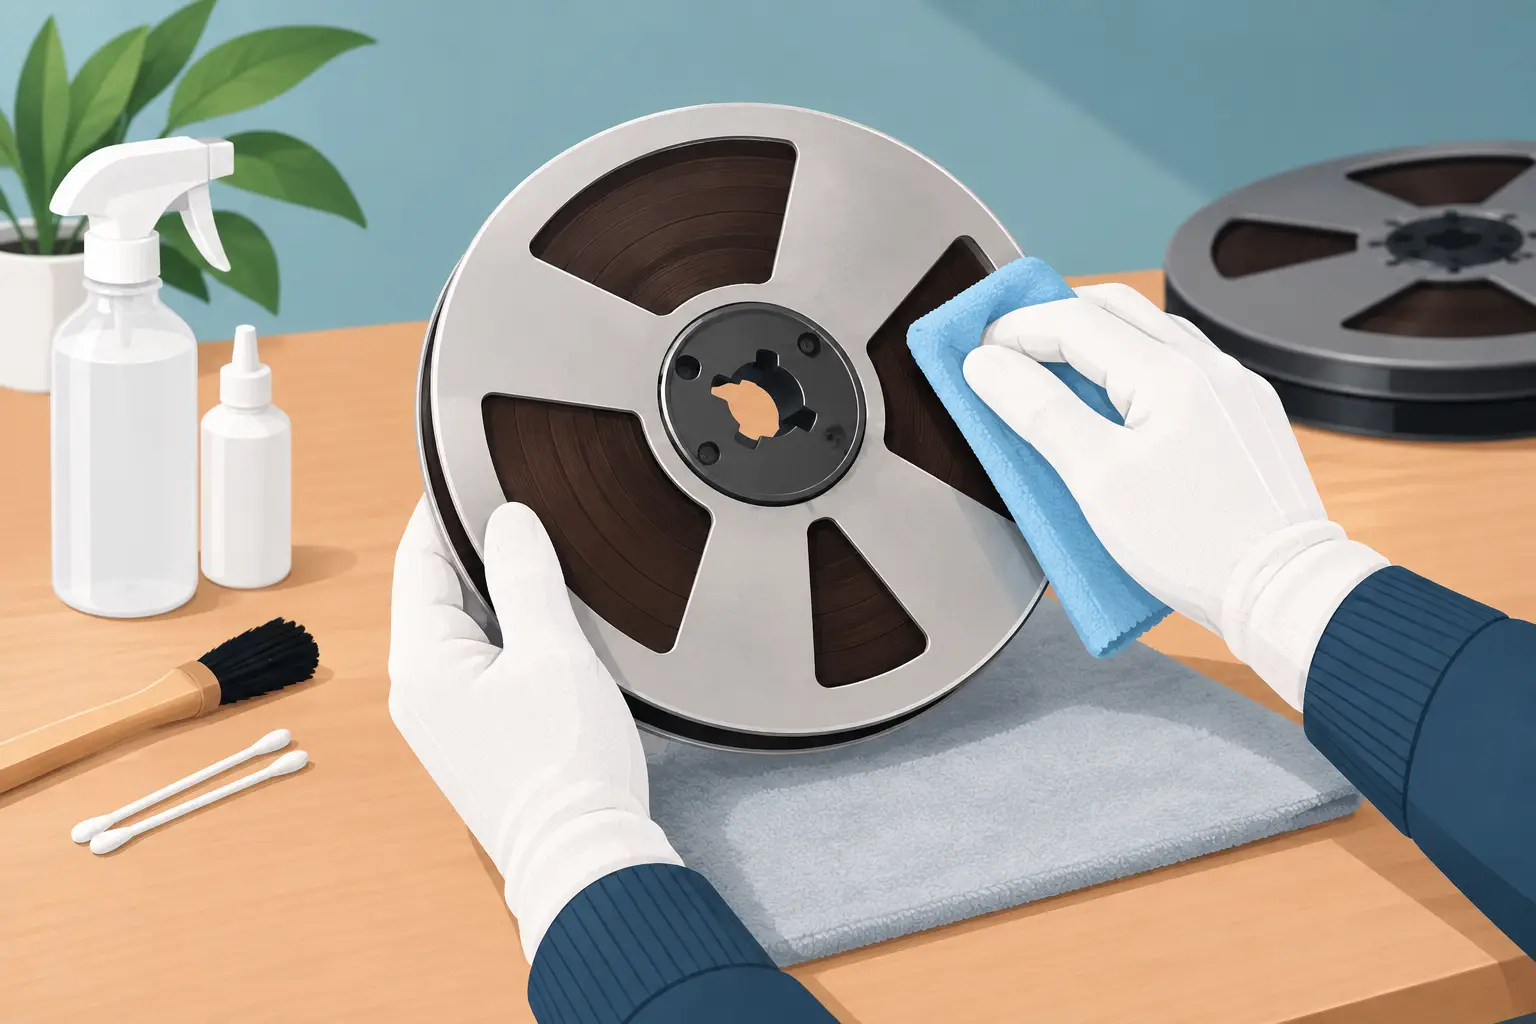
A visual and tactile inspection can reveal problems that a transport should never be asked to solve. Work on a clean, stable surface, and handle the reel by its hub and edges rather than touching the tape pack.

Look first at the pack. A flat, even tape pack with no protruding strands is encouraging. Cinching, popped strands, ripples, or a visibly uneven edge indicate poor winding, storage stress, or tape damage. A reel with severe pack deformation should not be fast-wound to “straighten it out.” It needs controlled handling on a properly maintained machine.

Smell can offer clues as well. A sharp vinegar odor may point to acetate-base deterioration. A musty odor can suggest storage in damp conditions, while a chemical or oily smell may indicate residue, contamination, or a prior treatment. Smell alone is not a diagnosis, but it tells you to inspect more closely.

Check for these common warning signs:

  • White or crystalline deposits, mold growth, or oily contamination on the tape or reel
  • Loose, lifting, dried-out, or failed splices
  • Flaking oxide, dull patches, edge damage, or curled tape
  • Sticky surfaces, squealing during gentle hand movement, or residue on guides
  • Brittle, translucent, or warped acetate tape

Some issues are manageable. A failed splice can often be replaced with archival-quality splicing tape, and a poorly wound reel can sometimes be re-packed under controlled tension. Other conditions require a transfer specialist, particularly mold, active acetate decay, severe binder failure, or fragile and damaged tape.

Why Tape Formulation Changes the Recovery Plan

Not all open-reel tape ages the same way. Base material, binder chemistry, storage history, recording format, and previous handling all affect recovery decisions.

Many older recordings were made on acetate-base tape. Acetate can become brittle, shrink, curl, or develop a vinegar-like odor as it deteriorates. A brittle acetate tape is at real risk of breaking during playback, especially around tight packs and old splices. It should never be forced through a machine simply because the reel turns by hand.

Polyester-base tape is generally stronger, but it is not immune to trouble. Certain back-coated and later formulations can develop binder hydrolysis, commonly called sticky-shed syndrome. The tape may feel tacky, squeal, stall, leave brown or black deposits on guides, or shed heavily. Continuing to play it in this state can damage the recording and contaminate the machine.

Controlled dehydration treatment, often called tape baking, can temporarily stabilize some tapes affected by binder hydrolysis. It is not a universal cure, not appropriate for every formulation, and not a substitute for proper storage. It must be done with accurately controlled equipment and a recovery plan already in place. A tape treated successfully should be transferred promptly, not returned to ordinary use for years of repeated playback.

This is where brand and formulation knowledge matters. Two tapes of similar age can require completely different handling. A correct identification can prevent a damaging guess.

Prepare the Machine Before You Prepare the Tape

A valuable tape deserves more than a reel-to-reel deck that merely powers on. The playback machine must match the tape’s width, track configuration, equalization, speed, reel size, and hub type. A 1/4-inch quarter-track consumer recording, for example, cannot be accurately recovered on a machine set up only for half-track playback. A 1/2-inch or 1-inch multitrack reel requires equipment designed for that width and format.

Speed is equally important. Common consumer and professional speeds include 1 7/8, 3 3/4, 7 1/2, 15, and 30 ips. Playing a tape at the wrong speed produces an obvious pitch error, but wrong equalization or track alignment can create subtler losses in bass, treble, and channel separation.

Before loading the original, clean the tape path and inspect guides, lifters, pinch rollers, capstan, heads, and reel tables. Demagnetize only when appropriate and with the machine powered down, using correct technique. Confirm that fast wind and playback are stable with a noncritical test tape. Worn heads, poor tension, hardened rollers, and misalignment can permanently compromise a transfer.

For high-value recordings, the best deck is not necessarily the newest or most attractive one. It is the properly serviced machine that matches the original recording format and has been aligned for faithful playback.

Make the First Transfer the Best One

Every pass is a use event. Even a tape that appears stable may have only a limited number of safe plays left. Plan the transfer before pressing play.

Capture at a professional-resolution digital format, typically 24-bit with a sample rate appropriate to the source and project requirements. Preserve a flat archival master transfer before applying noise reduction, equalization, level changes, or edits. Restoration can be useful for access copies, but the unprocessed capture remains the most defensible preservation file.

Monitor the entire pass. Listen for dropouts, speed instability, scraping, squealing, distortion, channel loss, or changes in oxide shedding. Watch the tape path for buildup. If the tape begins leaving residue or behaving abnormally, stop rather than trying to power through the reel. The recording can be reassessed; damage from a continued pass may not be reversible.

Document what happened during transfer. Note the machine used, tape speed, track format, equalization setting, visible defects, interruptions, and whether any intervention was performed. This information helps future archivists understand the files and avoid repeating work that has already been done.

Store the Original After Recovery

A digital transfer protects access, but the original reel remains an artifact and may contain information that was missed or could be recovered differently later. Return it to a clean, properly sized box with its labels and documentation. Avoid tightly sealing tape in ordinary plastic bags, which can trap moisture and plasticizer odors.

Store reels upright on their hubs in a cool, dry, stable environment away from sunlight, heat sources, basements, attics, and exterior walls. Stability matters as much as ideal numbers. Repeated swings in temperature and humidity place more stress on tape than a consistently moderate storage area.

If a tape must be wound after transfer, use a controlled, even wind rather than high-speed rewind. The goal is a smooth pack with no cinching or protruding edges. Then leave the original alone unless there is a clear reason to access it again.

When Archival Tape Recovery Needs a Specialist

Many enthusiasts can safely inventory a collection, inspect reels, replace straightforward splices, and transfer stable tapes on a correctly maintained deck. But a specialist is the prudent choice when media is moldy, brittle, badly warped, heavily shedding, unusually valuable, or recorded in an unfamiliar professional format.

The same applies to tapes with unknown speed, track layout, or noise-reduction system. Guesswork may produce a disappointing file, but it can also result in an unnecessary playback pass. For rare formats and hard-to-source tape, knowledgeable support and properly matched equipment are part of preservation, not an extra expense.

The most useful rule is simple: if a tape gives you a reason to hesitate, let that hesitation guide the next step. A careful inspection today can preserve the chance to hear that recording clearly for decades to come.

RMGI 468 Review: Is This Studio Tape Worth It?

A reel of RMGI 468 is not a casual buy for someone who simply wants any tape that will record. It is a professional-grade formulation with a long lineage, a particular calibration range, and a reputation built around disciplined studio use. This RMGI 468 review looks at what that reputation means on a real tape machine: its sound, operating level, handling, and the situations where it remains a very smart choice.

For recordists and archivists, the central question is not whether 468 is good tape. It is whether it is the right tape for the machine, the alignment, and the job at hand. Those are not always the same thing.

What RMGI 468 Is

RMGI 468 follows the professional SM468 lineage developed under BASF and later manufactured through the EMTEC and RMGI eras. It is a long-play, studio-oriented polyester tape formulation intended for demanding recording rather than low-cost consumer use. In practical terms, it offers high output, low noise, excellent coating consistency, and the kind of physical stability that makes a difference during repeated passes and long sessions.

Its place in the tape world is easy to understand when compared with more familiar alternatives. It is not the most aggressively high-output tape ever made, and it does not ask a machine to be pushed as hard as formulations designed for very high operating levels. Instead, 468 occupies a useful middle ground: serious professional performance with broad machine compatibility when the deck is properly aligned.

That balance is a major reason the formulation has lasting appeal. A tape that sounds impressive but is poorly matched to an older recorder can create more frustration than music. RMGI 468 is often a more forgiving choice than the hottest formulations, especially on well-maintained vintage decks that were designed around established professional tape standards.

RMGI 468 Review: Sound and Recording Performance

The character of 468 is controlled rather than flashy. Properly calibrated, it delivers a clear top end, solid midrange definition, and confident bass without the soft, congested quality associated with worn consumer tape. Transients remain intact, and dense arrangements can hold together well when the machine itself has good heads, stable tape transport, and correct electronics.

Noise performance is one of its strongest qualities. This is not a tape that makes analog recording silent, nor should it be expected to. Tape hiss remains part of the medium. But 468 provides a low enough noise floor for serious stereo recording, mixdown work, and many archival transfers, particularly when used at professional tape speeds. Its consistency also helps the engineer make sensible gain decisions instead of chasing unpredictable level changes across a reel.

The tape takes level well, but calibration matters. If a deck is biased and aligned too conservatively, 468 may not reveal its full potential. If it is aligned too aggressively, high-frequency response and distortion performance can suffer. The goal is not to find the loudest possible meter reading. The goal is to establish an operating level that gives the recording enough headroom while preserving tonal balance.

For many machines, 468 makes sense as a practical alternative when you want more headroom than classic standard-output tape but do not want to rebuild your workflow around an extremely high-output formulation. That can be especially relevant for owners of TEAC, TASCAM, Otari, Revox, Studer, Ampex, and other serious recorders, although no model name alone guarantees a correct setup. Condition and alignment always come first.

Bias Is Not an Optional Detail

A reel-to-reel recorder should be biased and equalized for the tape being used whenever performance matters. Recording onto 468 with settings intended for another formulation may still produce sound, but it is not a meaningful test of what the tape can do.

Bias affects treble response, distortion, modulation noise, and the way the tape handles peaks. Equalization affects the playback curve and tonal accuracy. A machine aligned for a lower-output tape can leave performance on the table, while a machine aligned for a hotter tape may produce results that seem dull, brittle, or prematurely saturated.

If your deck has fixed factory calibration and no practical adjustment path, 468 can still be usable. The question becomes whether the results satisfy you at your chosen speed and recording level. For critical work, test tones and a known reference are far more useful than assumptions based on brand reputation.

Handling, Wind Quality, and Reliability

Professional tape earns its keep partly through mechanical behavior, and 468 has historically been respected for its handling. A stable tape pack, clean slitting, and predictable winding reduce the small interruptions that can derail a session. On a healthy transport, the tape should wind evenly and pass smoothly across the heads and guides.

That does not mean every reel sold under an RMGI label should be treated as identical. RMGI-branded tape is now commonly encountered as NOS or existing stock, and storage history matters. A sealed reel from a climate-controlled environment is a different proposition from one that has spent years in a hot attic, damp basement, or unknown storage facility. Packaging condition, leader integrity, edge damage, and any odor or residue should all be considered before using a reel for an irreplaceable recording.

One advantage of this formulation family is that it is generally associated with stable modern polyester tape construction rather than the notorious binder problems found in certain older back-coated tapes from other product lines. Still, age and storage can affect any magnetic media. Inspect first, clean the tape path, and do a short test recording before committing a master or archival transfer.

Where 468 Makes the Most Sense

RMGI 468 is at its best when the project benefits from professional tape behavior but does not require the absolute maximum operating level available from newer high-output options. It is a strong fit for stereo masters, live two-track recording, analog mixdown, small-studio sessions, and machine owners who want a dependable formulation without excessive strain on an older deck’s calibration range.

It can also be a practical choice for users who value repeatability. A well-aligned recorder paired with good 468 stock can make it easier to revisit a workflow months later without relearning every gain decision. That is valuable for hobbyists building a consistent recording practice and for institutions that need disciplined procedures around analog equipment.

For archiving, the answer is more conditional. If you are recording new preservation copies or access copies, 468 can be an excellent recording medium. If you are transferring original historical tapes, the source tape should dictate the playback setup. You do not choose a transfer configuration because the destination reel is 468; you choose it because the source format, equalization, speed, track layout, and condition require it.

When Another Tape May Be Better

If your recorder is calibrated for a very high-output tape and you regularly record loud rock, drums, or heavily compressed material, a hotter formulation may provide more usable headroom. Conversely, if your deck is a lightly serviced consumer machine with limited adjustment and marginal transport performance, a less demanding tape may deliver more predictable results.

Run time also matters. Tape thickness, reel size, and intended duration should be selected together. Do not buy a formulation solely for its sonic reputation if the reel length creates a handling compromise your machine does not like. A 7-inch home recorder, a 10.5-inch studio deck, and a portable field machine can have very different needs.

Buying RMGI 468 With Confidence

The most useful buying question is not simply, “Is it sealed?” Ask what is known about the reel’s storage, format, width, reel size, leader, and condition. A sealed NOS reel can be highly desirable, but an accurately inspected reel with clear condition information may be the better choice when you need immediate confidence for a session.

For used or refurbished tape, look for transparent performance grading and a seller who understands tape-specific failure modes. Reel to Reel Warehouse approaches tape as recording media, not generic vintage stock, which matters when the difference between a clean recording and a damaged head stack can come down to one poorly stored reel.

RMGI 468 rewards the user who treats tape selection as part of the recording chain. Put it on a clean, aligned machine, set your levels with purpose, and give it a short test pass before the session begins. When the machine and tape are matched, 468 does not need to advertise itself with exaggerated color or brute-force output. It simply gives the recording a stable, professional place to live.

Tape Recording Bias Guide for Better Playback

A deck can sound clean with one reel and strangely dull, brittle, or noisy with the next – even when both tapes are in good condition. The reason is often bias. This tape recording bias guide explains the adjustment that sits behind much of a reel-to-reel machine’s recording performance, and why a tape formulation is never simply “a tape is a tape.”

What Recording Bias Actually Does

Bias is a high-frequency AC signal added to the audio signal during recording. It is far above the range of human hearing, commonly in the tens or hundreds of kilohertz, and its job is to make magnetic tape respond more linearly to music or speech.

Without bias, magnetic particles on tape do not follow low-level audio changes smoothly. The result is severe distortion, poor low-level detail, and an audible roughness that no amount of playback EQ can repair. By adding a controlled ultrasonic signal at the record head, the recorder moves the tape’s magnetic operating point into a range where audio can be captured with much better accuracy.

Bias is a record-side adjustment only. It does not alter a pre-recorded tape as it plays back. If a commercially recorded reel sounds wrong, the likely causes are tape condition, playback equalization, head alignment, speed, track format, or the source recording itself. Bias becomes relevant when you are making a new recording.

Why Tape Formulation Changes the Right Bias Setting

Different tapes need different amounts of bias energy. Tape manufacturers developed formulations with varying oxide chemistry, particle size, coercivity, and output capability. Those differences are why a vintage low-output tape, a high-output studio formulation, and a modern production tape may not deliver the same result on identical deck settings.

A deck calibrated for conventional tapes such as older Scotch 150, 203, or similar general-purpose stock may under-bias a high-output tape. In practical terms, that can produce elevated treble at first listen, but also harsh high frequencies, increased distortion, and unstable behavior on difficult material. Conversely, a high-output tape used on a machine set for a lower-output formulation may be over-biased, often creating softer highs and lower output.

The correct setting depends on more than the brand printed on the box. Tape speed matters. A formulation can require one bias setting at 7 1/2 ips and another at 15 ips. Track width, head design, tape thickness, recorder electronics, and the machine’s equalization standard also affect the final result. This is why the “high bias” or “low bias” labels on consumer machines are only broad starting points, not universal promises of compatibility.

Under-Bias and Over-Bias: What You Hear

Bias adjustment is a trade-off. There is no single setting that maximizes every measurement at once. The goal is a balanced result with strong high-frequency performance, controlled distortion, appropriate recording level, and predictable behavior across the usable spectrum.

When a Tape Is Under-Biased

Under-biasing means the tape receives too little bias current for its formulation. The recording may initially seem bright because high-frequency output rises near the under-biased side of the curve. That apparent detail can be misleading.

Listen for edgy cymbals, sibilants that spit rather than sound natural, gritty vocal peaks, and rising distortion as level increases. Low-level passages may also sound less refined. A severely under-biased recording can have a brittle, attention-grabbing character that becomes fatiguing quickly.

When a Tape Is Over-Biased

Over-biasing means the tape receives more bias current than the formulation needs. The most common symptom is high-frequency loss. Voices may lose air, percussion can become less immediate, and the recording may feel slightly veiled compared with the source.

A modest amount of over-bias is often chosen deliberately during professional alignment because it can lower distortion and produce more stable results. The trade-off is accepted only when the high-frequency loss remains within the desired specification. Too much over-bias is not a safety setting. It simply leaves usable performance on the table.

Bias Is Not the Same as Record Level or EQ

These adjustments work together, but they do different jobs. Record level determines how strongly the audio signal is recorded. Record EQ shapes the frequency balance sent to the record head. Bias controls the tape’s magnetic response during that process.

Changing record level cannot correct the distortion pattern of incorrect bias. Changing EQ may make a biased recording sound more balanced at one frequency range, but it cannot restore information lost through excessive over-bias or eliminate nonlinear behavior caused by under-bias. A proper calibration treats bias, record level, and record EQ as a connected system and adjusts them in the correct order.

This distinction matters when evaluating used tape. If a recording made on another machine sounds unusually bright or dark, do not assume the tape itself is defective. The original recorder may have been set for a different tape family, speed, or equalization curve.

How Technicians Set Bias on a Reel-to-Reel Deck

Accurate bias setup requires a calibrated signal source, appropriate test tape or reference standard for the machine, reliable meters, and ideally an AC millivoltmeter or distortion analyzer. Service documentation is equally valuable because adjustment points and specified frequencies vary by deck.

A common method is the over-bias technique. The technician records a high-frequency tone, often 10 kHz or 15 kHz depending on the deck and speed, while gradually increasing bias current. High-frequency playback output rises to a peak and then begins to fall. The bias is set a specified amount below that peak, known as the over-bias amount.

The specified drop might be expressed in decibels and will vary by tape formulation, tape speed, and manufacturer recommendation. The setting is then checked with additional frequencies and levels before record level and record EQ are finalized. The process sounds straightforward, but small changes can matter, especially on narrow-track machines or decks intended for high-output tape.

Do not adjust internal bias trimmers by ear alone unless you are prepared to accept uncertain results. A favorite commercial recording is not a calibration reference, and a bright sound is not proof that a deck is correctly aligned. On many vintage recorders, touching the wrong trimmer can shift a channel enough to create a mismatch that is harder to diagnose later.

Choosing Tape for a Deck That Has Not Been Calibrated

Many home recordists use a deck exactly as it was last serviced, or as it left the factory decades ago. That is perfectly workable if expectations are realistic. Start with a tape type the manufacturer listed for the recorder, particularly when making recordings you want to keep.

If your machine offers tape-selector positions, use the position intended for the closest equivalent formulation. Older consumer decks are often happiest with standard-play, lower-output tape, while better semi-pro and professional machines may include settings or internal adjustments for higher-output stock. Consult the deck manual when available, but remember that tape names and formulations changed over time.

Before committing to an important session, make a short test recording with wide-ranging material: spoken voice, sustained acoustic instruments, percussion, and strong high-frequency content. Compare the source and playback at normal listening level. Check both channels for equal brightness, similar output, and clean peaks. A brief test is far less costly than discovering a problem after recording an entire reel.

Tape Condition Can Complicate the Diagnosis

Correct bias will not cure physical tape problems. Shed, sticky-shed behavior, edge damage, uneven winding, print-through, oxide loss, and previous damage can all affect the sound or transport performance. A tape that leaves residue on guides and heads should not be used for a critical recording session, regardless of how suitable its formulation may be.

Likewise, a reel that was recorded years ago can preserve the decisions of a different machine. A dull playback may reflect an over-biased original recording. A harsh one may reflect under-bias, excessive record EQ, or overload. When assessing older material, separate the condition of the tape from the calibration choices made when it was recorded.

For new recordings, reliable tape stock makes troubleshooting much easier. When the tape is known to be clean, usable, and correctly identified, you can evaluate the machine’s setup rather than guessing whether the media is the source of the problem.

When a Professional Alignment Is Worth It

A complete alignment is especially worthwhile if you have changed tape formulations, restored a deck, replaced heads or electronics, noticed channel imbalance, or plan to record valuable performances. It is also a smart move for archivists creating preservation copies, where repeatability matters more than a pleasing first impression.

For casual recording, you may decide that a compatible tape and a successful test reel are enough. For archival work or serious music production, calibration is part of protecting the recording itself. The best tape in the world cannot deliver its intended performance through a recorder that is set for something else.

Bias is one of the quieter parts of analog recording, but it explains why the right reel and the right machine settings belong together. Give each unfamiliar tape a short, deliberate test, keep notes on what your deck prefers, and your recordings will be far easier to trust years from now.

Scotch 206 Review for Reel-to-Reel Users

Scotch 206 remains one of the most recognizable names in vintage open-reel recording, but a useful Scotch 206 review has to begin with condition, not nostalgia. A clean, properly stored reel can be an excellent choice for playback, home recording, and period-correct studio work. A reel affected by binder breakdown can quickly coat heads, guides, and capstans with oxide and bring a session to a halt.

For collectors and working tape users, 206 is compelling because it combines a practical 1.5 mil base with a back-coated finish and a formulation that was widely used in serious home and professional environments. It is also a tape family with a well-earned reputation for sticky-shed syndrome. That does not make every reel unusable. It does mean the label alone can never be treated as a condition grade.

Scotch 206 Review: What You Are Actually Buying

Scotch 206 is a quarter-inch, back-coated, standard-play recording tape. It was commonly supplied as 1,800 feet on a 7-inch reel, providing roughly 48 minutes of recording time in one direction at 7.5 ips, 96 minutes at 3.75 ips, or 24 minutes at 15 ips. The 1.5 mil base is materially more durable than the thinner 1 mil stock used for long-play tape, which makes 206 a sensible format for regular handling and repeated use.

The back coating is more than a cosmetic detail. On a healthy reel, it helps the tape wind evenly, reduces static, and provides a stable, professional feel during fast wind. That stable pack matters when a reel will be stored for years or replayed on a machine with strong reel motors. Compared with older non-back-coated consumer tape, 206 generally feels better suited to disciplined transport handling.

Its original appeal was low-noise, higher-output performance for its era. A well-preserved reel can offer satisfying dynamics, low background noise, and a dense, familiar analog presentation. It is not a modern high-output formulation, however. Do not assume that a calibration designed for later +6 operating-level tape will give the best results. The deck, head condition, tape speed, and intended use all matter.

The Sound: Why Healthy 206 Still Has Fans

On a machine that is clean, aligned, and appropriately biased, good Scotch 206 can sound focused and energetic. At 7.5 ips, it is capable of strong music recordings with better high-frequency stability and lower noise than many earlier consumer-grade tapes. At 15 ips, where the machine supports it, the format has enough physical stability to be useful for critical transfers and recording projects.

Its sonic character should not be reduced to a single description. A reel recorded decades ago carries the fingerprint of the recorder that made it: the head alignment, recording level, bias, tape speed, microphone chain, and storage history all affect what you hear. A 206 reel that sounds slightly dark on one deck may be accurately reproducing a recording made with different head azimuth or equalization. Before blaming the tape, check playback alignment and compare it with a known-good reference reel.

For new recording, 206 can be enjoyable when you want authentic vintage performance rather than maximum possible headroom. Users who push levels aggressively may prefer a later high-output formulation. Users recording speech, acoustic music, radio airchecks, or archival copies at sensible levels may find 206 more than adequate, provided the reel is stable.

The Major Trade-Off: Sticky-Shed Syndrome

The central caution with Scotch 206 is binder degradation. Many examples from this tape family are susceptible to sticky-shed syndrome, a moisture-related failure in which the binder becomes tacky. The result can range from mild squealing and residue to severe stiction that makes normal playback unsafe.

A reel should be inspected before it is threaded on a valuable deck. Common warning signs include:

  • A gummy feel or visible residue on the tape path after a brief test
  • Squealing, chirping, or speed fluctuations during playback
  • Excessive drag, poor winding, or tape that seems to cling to guides
  • A dull, uneven pack, loose edge damage, or oxide that transfers to fingers

No single symptom provides a complete diagnosis. A reel can have a poor tape pack without sticky shed, and a neat-looking reel can still leave deposits on the heads. Run a short, low-risk test section first, then inspect the guides, capstan, heads, and pinch roller area. If debris appears quickly or the tape audibly struggles, stop the machine rather than trying to force the reel through.

Proper controlled baking can often temporarily restore playability to affected polyester-based tape, allowing a transfer or one-time recovery pass. Baking is not a permanent cure, and it is not a casual fix for every tape problem. Temperature control, duration, reel construction, prior condition, and the tape base all matter. Acetate-backed tape requires different handling and should never be assumed safe for the same treatment. When the recording is unique or irreplaceable, professional transfer service is often the more conservative choice.

How 206 Compares With Scotch 207 and Later Tape

Scotch 206 and Scotch 207 are often mentioned together because they share a closely related recording formulation. The practical distinction is thickness. 206 is standard-play 1.5 mil tape, while 207 is the thinner long-play version commonly found in 2,400-foot lengths on a 7-inch reel. The extra running time of 207 is convenient, but the thinner base is less forgiving of rough handling, imperfect tape packs, and repeated fast winding.

For routine use, 206 has the advantage. Its heavier base is less prone to stretch and tends to inspire more confidence on older transports. For a long program, extended interview, or live recording where run time matters most, 207 can make sense if the reel is known to be stable and the machine handles thin tape well.

Later Scotch formulations, including higher-output studio products, may offer greater recording headroom and can be preferable for demanding multitrack or high-level recording work. That does not automatically make 206 obsolete. Vintage equipment is often happiest with tape closer to the operating levels and bias expectations of its own era. A properly set up deck and a healthy reel are more valuable than chasing a specification that the machine cannot fully use.

Machine Setup and Handling Recommendations

Before using 206, clean the entire tape path and demagnetize heads and metal guides only when appropriate for your maintenance routine. Check that the pinch roller is clean and supple, the brakes release evenly, and the take-up reel maintains a consistent pack. A tape transport that is already marginal can make any vintage tape seem worse than it is.

For playback of a prerecorded reel, start with the equalization and speed used on the original recording whenever that information is available. If the reel was recorded on another machine, small azimuth differences can reduce treble or blur stereo imaging. Make adjustments carefully and preserve the original alignment reference for your own recordings.

For recording, test with a short section before committing a full reel. Establish a sensible operating level, listen for clean high-frequency response, and avoid treating 206 like a modern high-output tape. If your recorder has adjustable bias and record EQ, calibration improves results substantially. If it does not, use conservative levels and judge the recording by actual playback, not meter readings alone.

Is Scotch 206 Worth Buying Today?

Scotch 206 is worth buying when its condition is known, the reel has been inspected or professionally evaluated, and its vintage performance profile fits the project. It is particularly appealing for users who value 1.5 mil durability, back-coated handling, period-correct recording media, and the substantial run time of a full 7-inch reel.

It is a less attractive choice when you need guaranteed trouble-free recording stock straight from the box, have a machine that is difficult to clean, or are transferring a one-of-a-kind recording without the ability to stop and assess the tape. In those cases, tested and graded tape from a specialist source can remove much of the uncertainty that comes with unverified vintage media.

Treat Scotch 206 as a capable classic with a condition-dependent reputation. Inspect it, test it gently, and let the tape’s actual behavior guide the next step. That approach protects both your recorder and the recordings that made reel-to-reel worth keeping alive.

Acetate Polyester Comparison for Reel Tape

A reel of tape can look perfectly ordinary until the first careful pull reveals its age. Some vintage tape has a crisp, almost paper-like feel and can snap under tension. Other tape feels tougher, more flexible, and may survive decades of handling – though it can bring a different set of storage risks. This acetate polyester comparison explains why the backing material matters before you play, wind, restore, or buy reel-to-reel tape.

The base film is not the magnetic coating. It is the clear support layer beneath the oxide, and it determines much of a tape’s physical behavior. For collectors, recordists, and archivists, knowing whether a reel is acetate- or polyester-backed helps prevent broken tape, damaged recordings, and poor purchasing decisions.

Why Tape Base Material Matters

Magnetic tape has three essential components: the base film, the binder that holds the coating in place, and the magnetic oxide that stores the recording. The base is the structural foundation. It controls tensile strength, stretch, tear resistance, and how safely a reel handles fast winding or transport through a machine.

Acetate was widely used on early recording tape, particularly from the late 1940s through much of the 1950s. Polyester, often called Mylar in the tape world, became the dominant base material as manufacturers sought stronger, thinner, and more durable tape. By the 1960s, polyester had become common across consumer, broadcast, and professional formats.

That broad timeline is useful, but it is not a complete identification method. A tape’s brand, formulation, reel size, box style, and recording history can all complicate the picture. Treat the tape itself as the primary evidence.

Acetate Polyester Comparison: The Practical Differences

The most significant difference is strength. Acetate tape has relatively low tensile strength and is vulnerable to breaking when pulled, especially if it is dry, brittle, spliced poorly, or tightly packed. Polyester tape is substantially stronger and resists tearing far better. That strength made it well suited to long-play formulations, repeated use, and professional handling.

Polyester’s advantage has a trade-off. When a polyester tape catches in a transport, it may not break before placing stress on the machine, the splice, or the recording pack. Acetate often breaks first. A break is frustrating, but it can act as a kind of mechanical fuse. Neither behavior is desirable, which is why clean guides, correct tension, and a properly serviced deck remain essential.

Acetate also feels different in the hand. It is generally stiffer and less springy than polyester. When held up to a bright light, acetate base film can sometimes show a faint translucent or amber character, while polyester may appear clearer. These clues are helpful, not definitive. Do not bend, crease, or aggressively pull a tape to identify it.

A careful tear test has historically been used as an identification shortcut: acetate tends to tear more easily, while polyester resists. For recorded or valuable tape, that is the wrong test. The risk is not worth the answer. Inspect a leader end, a loose tail, or an unrecorded section only if it can be done without sacrificing material.

Acetate Tape: Historic, Valuable, and Fragile

Acetate-backed tape is often found in early home recordings, radio material, field recordings, spoken-word archives, and amateur music sessions. Its age alone can make the content historically important, even when the reel has little collector value as a physical object.

The principal concern is embrittlement. Over time, acetate can lose flexibility and become prone to cracking or snapping. It may break at a splice, at the hub, or in the middle of a recorded passage. A reel that appears fine at rest may still fail under normal playback tension.

Before attempting playback, inspect the pack for uneven winding, curled edges, loose layers, white residue, or obvious breaks. Gently rotate the reel by hand and look for sections that lift, buckle, or resist movement. If the tape is brittle, badly warped, or repeatedly breaking, stop rather than forcing it through the machine.

For acetate reels with unique content, the objective is usually not repeated enjoyment. It is safe transfer. Use a well-maintained machine, conservative handling, and appropriate take-up tension. If the recording is irreplaceable and the tape is clearly unstable, professional archival transfer may be the wiser choice.

Polyester Tape: Tougher Base, Different Preservation Risks

Polyester tape is generally easier to handle because it is strong, flexible, and resistant to tearing. It is also the base material found on many familiar recording stocks from brands such as Ampex, BASF, Scotch, Maxell, and TDK. For active reel-to-reel users, polyester is usually the more practical choice.

However, polyester base does not mean the tape is automatically safe to play. The most widely discussed problem with many later polyester tapes is sticky-shed syndrome, a binder-related failure rather than a failure of the base film itself. Affected tape can squeal, shed oxide, feel tacky, leave deposits on tape guides, or stop moving smoothly through the transport.

That distinction matters. Acetate tape may fail because the backing has become brittle. Polyester tape may be physically strong while the binder holding its oxide coating has absorbed moisture and degraded. A strong backing cannot protect the recording from binder failure.

If a polyester tape squeals, slows down, sticks, sheds heavily, or leaves brown residue on heads and guides, stop playback. Continued running can damage the recording and contaminate the tape path. Some tapes can be stabilized for controlled transfer through established archival conditioning methods, but the exact approach depends on the formulation and condition. It is not a universal repair or a routine preparation step.

How to Identify the Right Handling Approach

The goal is not merely to label a tape acetate or polyester. The goal is to choose the safest next step. Start by checking the reel, box, and any handwritten notes. Original packaging may identify the brand, stock number, tape length, and formulation. Those details often narrow the likely base material and known age-related concerns.

Next, perform a visual inspection in good light. Look at the tape edges and the overall pack. Acetate may show stiffness, edge cracking, cupping, or brittleness. Polyester may show a stable-looking pack even when binder trouble is present, so also watch for residue, tackiness, or an odor associated with degradation.

Then consider the tape’s intended use. A blank reel for a home recording project and a one-of-a-kind family tape should not be treated the same way. If the content is irreplaceable, avoid casual test playback. A few seconds of information is rarely worth risking an entire recording.

For reusable stock, confirm the tape width, reel size, hub type, recording speed, and machine compatibility before loading it. Base material is only one part of tape selection. A 7-inch reel of 1/4-inch polyester tape may be mechanically sound yet unsuitable for your machine’s equalization, intended recording level, or spool capacity.

Choosing Tape for Recording and Collecting

For most users making new recordings, polyester-backed tape is the practical standard. Its durability supports repeated winding, editing, playback, and normal machine use. It is especially well suited to enthusiasts who record frequently or work with higher-output formulations.

Acetate tape remains relevant for collectors and archivists because it represents a major period in recording history. It can contain performances, broadcasts, interviews, and personal documents that exist nowhere else. Its value lies in careful preservation, accurate identification, and transfer planning rather than hard daily use.

When buying vintage tape, do not assume that a clean box guarantees a clean reel. Ask about condition, prior use, spool type, tape grade, and whether the tape has been inspected or refurbished. A trustworthy specialty source should describe what is known, distinguish tested stock from untested material, and help match the reel to your format and purpose.

Reel to Reel Warehouse serves this market with format-specific inventory and the kind of condition knowledge that matters when tape is no longer a simple commodity. Whether you are seeking an empty reel, usable recording stock, or a hard-to-find width, the right choice begins with the tape’s actual condition rather than its age alone.

A reel of acetate deserves patience; a reel of polyester deserves scrutiny. If you approach both with a clean machine, a careful inspection, and a clear plan for the recording, you give the tape its best chance to keep playing for years to come.

Reel Tape Brands Comparison for Better Matches

A reel tape brands comparison is most useful when it starts with the question that matters: what will this tape do on your machine, in your room, and over time? Brand names carry real history, but they do not tell the whole story. A late-production professional formulation can behave very differently from an earlier tape sold under the same familiar label. For recording musicians, playback collectors, and archivists, formulation, condition, width, track format, and intended use matter at least as much as the name on the box.

The right choice is rarely the universally best tape. It is the tape that matches your recorder’s bias and equalization options, the speed you use, the material you are preserving or recording, and your tolerance for risk with vintage stock. That is why experienced reel-to-reel users compare brands as families of tape formulations rather than treating every reel from one manufacturer as identical.

Reel Tape Brands Comparison: Start With Formulation

Tape formulation determines coercivity, output level, noise performance, bias requirements, and long-term stability. In practical terms, it affects how loudly you can record before distortion rises, how quiet the tape sounds in silent passages, and whether your deck can properly calibrate it.

A standard-bias tape can be an excellent match for many vintage consumer recorders. A high-output tape offers more headroom, but only if the machine can supply enough bias and has calibration flexibility. Put a modern high-output formulation on a deck set up for lower-output tape, and the result may be disappointing: uneven frequency response, excess distortion, or a sound that is brighter or duller than expected.

The tape’s base thickness also matters. Standard-play tape uses a thicker base and is generally the safest choice for regular handling. Long-play and double-play stock provide more recording time on a reel, but the thinner base is easier to stretch, crease, or damage. For an archive master or a tape that will see repeated handling, a thicker, stable base is often the wiser trade-off.

BASF, AGFA, and Later European Formulations

BASF and AGFA tape are well regarded by collectors and archivists because many formulations have aged more predictably than some competing vintage products. That does not make every reel automatically safe, but it is one reason these brands are frequently sought for playback and reuse. Their tape history includes consumer, broadcast, and professional products, so model identification still matters.

Later BASF professional tape, along with products from the BASF-to-EMTEC lineage and its successors, became known for dependable oxide stability and consistent manufacturing. Modern RTM tape continues part of that European professional-tape tradition. For users with capable machines, RTM formulations offer a practical route to fresh tape with known performance characteristics rather than the uncertainty of decades-old sealed stock.

The trade-off is calibration. Higher-output RTM formulations are not a drop-in replacement for every vintage reel deck. A recorder that was designed around conventional tape may perform better with a standard-output formulation, while a properly aligned studio machine can take full advantage of higher output and lower noise.

Ampex and Quantegy: Excellent Performance, Condition Is Critical

Ampex made some of the most influential professional recording tapes ever produced. Many classic master recordings were made on Ampex formulations, and later Quantegy products remained a common studio standard. When the tape is healthy and the machine is aligned for it, these formulations can deliver strong output, wide bandwidth, and the authoritative analog sound many recordists expect.

However, this is where a brand-only comparison can lead buyers astray. Certain Ampex and Quantegy formulations are associated with sticky-shed syndrome, a binder breakdown that can make tape squeal, shed oxide, leave deposits on heads and guides, or stop moving through the transport. The problem is formulation-specific and storage-dependent. It is not a reason to dismiss all Ampex or Quantegy tape, but it is a reason to inspect, identify, and test any vintage reel before important playback.

For archival work, a tape showing sticky-shed symptoms may require controlled restoration procedures before transfer. Do not force a shedding reel through a machine. A damaged tape can compromise both the recording and the recorder. For reusable tape, condition grading and careful evaluation are more meaningful than the logo alone.

Scotch and 3M: A Broad Legacy With Major Differences

Scotch and 3M produced an enormous range of reel tape, from common home-recording stock to high-performance professional formulations. That breadth is their strength and the source of most confusion. A well-preserved Scotch reel can be a very good choice for playback, home recording, or period-correct use, but specific series vary substantially in output, backing, and aging behavior.

Earlier acetate-backed Scotch tape deserves special caution. Acetate can become brittle with age, and a damaged splice or sharp bend can cause breakage. Polyester-backed tape is typically more durable, but it still must be checked for shedding, edge damage, curl, and old adhesive residue. If you are buying tape for a vintage recorder with modest bias capability, a conventional Scotch formulation may suit the machine better than a later high-output professional tape.

For collectors, original Scotch reels also have appeal as authentic period media. For critical new recordings, though, known-condition stock and a formulation compatible with your deck should take priority over label nostalgia.

Maxell and TDK: Popular Choices for Consumer Decks

Maxell and TDK built strong reputations among home recordists, audiophiles, and owners of quality consumer reel decks. Their tape was widely distributed, consistently packaged, and available in formulations that worked well with many Japanese, European, and American recorders. A clean reel of Maxell or TDK can be an attractive option for playback or new recording on a well-maintained consumer machine.

Maxell is especially familiar to enthusiasts because certain later reel products earned a reputation for good consistency and comparatively favorable aging. TDK also produced respected reel tape, though availability can be less predictable depending on width, reel size, and formulation. As with any vintage stock, unopened does not guarantee perfect condition. Storage temperature, humidity, and the condition of the leader and hub all still deserve attention.

These brands are often a sensible middle ground for users who want quality tape without immediately moving into professional studio formulations. They are not inherently better than BASF, Ampex, or Scotch. They simply fit a different set of machines and expectations.

ATR and Current Production Tape

For serious new recording, current-production tape removes many of the variables that come with vintage media. ATR Magnetics tape is designed for high-performance analog recording and is commonly chosen by users with machines that can be aligned for modern high-output formulations. Fresh tape offers a known history, clean pack, intact leader, and no mystery about decades of storage.

That certainty has value for mastering, multitrack work, and recordings that cannot be recreated. The consideration is again machine setup. ATR tape can reward proper alignment with excellent headroom and low noise, but an uncalibrated consumer deck may not show its best qualities. If your machine has fixed bias and equalization, check its manual and its established tape compatibility before selecting a premium high-output formulation.

How to Match the Brand to Your Job

For archival playback, prioritize the tape’s current condition and the ability to safely transfer it. The brand helps identify likely characteristics, but the individual reel decides whether it is ready to run. Look for shedding, odor, warped flanges, damaged leader, loose or uneven winding, and evidence of poor storage. A clean tape path and conservative handling are essential.

For recording on a consumer deck, choose a formulation your machine can bias correctly. Standard- or moderate-output tape may give more satisfying results than high-output tape that the electronics cannot support. Test recordings at your normal speed, then listen for clean high frequencies, stable bass, acceptable noise, and freedom from audible distortion on strong peaks.

For studio or enthusiast recording on a calibrated machine, fresh ATR or RTM tape offers the clearest path to repeatable results. Select width and reel size based on your recorder, then choose the formulation around your desired operating level and noise performance. Half-track stereo, quarter-track stereo, and multitrack formats are not interchangeable, regardless of how appealing a tape brand may be.

For refurbished tape, performance grading is especially valuable. A properly evaluated reel can be an economical choice for practice recordings, less-critical projects, and machines that benefit from familiar vintage formulations. It is also a practical way to keep a classic deck in regular use without consuming scarce sealed stock.

The Best Brand Is the One You Can Trust on Your Deck

A respected label is a useful starting point, not a final answer. BASF and related European formulations are often favored for stability, Ampex and Quantegy remain historically important high-performance choices that require formulation awareness, Scotch and 3M offer a vast but varied legacy, and Maxell and TDK remain familiar favorites for many consumer recorders. ATR and RTM give modern users fresh, predictable alternatives when the machine is properly matched and aligned.

At Reel to Reel Warehouse, the practical approach is to identify the tape, understand its condition, and match it to the recorder rather than buying on reputation alone. A carefully chosen reel lets you spend less time cleaning up tape problems and more time hearing what your machine was built to do.

Top Ways to Preserve Recorded Tapes for Decades

A reel of tape can look perfectly ordinary while carrying the only surviving copy of a live performance, family voice, radio broadcast, or master recording. The top ways to preserve recorded tapes are not complicated, but they do require consistency. Magnetic tape is a physical recording medium, and its condition is shaped by storage, handling, playback equipment, and the tape formulation itself.

For reel-to-reel users, preservation starts with a practical goal: keep the original tape stable and playable without creating new damage. That means resisting the urge to play an unknown reel immediately, avoiding extreme storage conditions, and recognizing when a tape needs professional attention before it goes near a machine.

Top Ways to Preserve Recorded Tapes

Keep temperature and humidity stable

Tape does best in a clean, climate-controlled area with moderate, stable temperature and relative humidity. For most home collections, a cool interior closet or dedicated room is far safer than an attic, garage, basement, storage shed, or exterior wall cabinet. The biggest problem is often fluctuation rather than a single imperfect reading. Repeated cycles of heat, cold, and humidity can stress the binder, leader, box, and reel.

Avoid storing reels near radiators, HVAC vents, windows, water pipes, or equipment that runs hot. Humid conditions can encourage mold and corrosion, while excessive heat can accelerate binder breakdown and print-through. Very dry environments are not ideal either, particularly when static makes tape attract dust.

A reasonable target for a personal collection is a consistently cool room with moderate humidity, rather than an attempt to build a museum vault. If your tapes include irreplaceable masters or institutional material, tighter environmental controls may be worthwhile. The priority is stability.

Store reels upright, fully supported, and away from magnets

Reel-to-reel tapes should generally be stored vertically, like records on a shelf, rather than stacked flat in tall piles. Vertical storage reduces pressure on the lower reels and helps prevent flange warping. Use shelves that support the box or container evenly, and do not pack tapes so tightly that removing one damages its neighbors.

Keep tapes in their original boxes when those boxes are clean, intact, and free of mold. If a box is crushed, water-damaged, or shedding debris, replace it with a clean archival-quality container sized for the reel. The reel itself should be protected from dust, light, and accidental impact.

Magnetic fields remain a concern, although ordinary household exposure is often overstated. Do not place tapes directly beside power transformers, large speakers, motors, bulk tape erasers, or other strong magnetic sources. More immediately damaging hazards include water, smoke, pets, and a shelf that can be bumped or tipped over.

Rewind tapes properly before putting them away

A tape that has been stopped mid-program or loosely wound is more vulnerable to edge damage, pack distortion, and uneven tension. Before long-term storage, wind the tape onto a clean reel at a controlled, even speed. A smooth tape pack has aligned layers and no obvious ridges, popped strands, or telescoping.

For many collections, storing a tape tails out is a sensible practice. In this position, the program has been wound through once after playback, and the tape is left at the end of the recording. Any print-through that develops is more likely to be heard as pre-echo rather than post-echo, which is usually less distracting. It also encourages a full rewind before the next play.

The right choice can depend on your workflow. A tape frequently used for reference may need a labeled head-out position for convenience. A preservation master that will sit untouched for years is a different case. What matters most is a neat, even pack created on a well-maintained machine.

Handle only the reel and hub whenever possible

The oxide-coated tape surface is not the place for fingerprints. Oils, dirt, lotion, and moisture can transfer to the tape and may affect playback or accelerate contamination. When loading a reel, hold the hub or outer reel edges. Keep food, drinks, and smoking materials away from the work area.

Use a clean, uncluttered table when inspecting or threading tape. If you need to touch the tape itself, clean nitrile gloves can be useful, but they are not mandatory for every routine task. Many experienced operators find that clean, dry hands and disciplined handling provide better control. Gloves become more useful when working with moldy material, damaged tape, or a reel that must be handled extensively.

Never pull tape abruptly from a reel, and do not use ordinary adhesive tape to repair a break. Splices require proper splicing tape, a suitable block, and a clean cut. A poor repair can snag in the tape path or damage a playback head.

Inspect Before You Play

A visual and odor check can prevent a great deal of trouble. Look for white, gray, or fuzzy mold; powdery deposits; warped flanges; cracked hubs; splices that are lifting; and a tape pack that appears uneven. Smell matters too. A sharp vinegar odor can indicate acetate base deterioration, while some affected polyester tapes may have a sour or chemical smell associated with binder issues.

Do not assume every old tape is unsafe. Many vintage reels remain very playable when stored well. The point of inspection is to identify warning signs before the tape passes over guides, heads, and capstans.

Watch for sticky-shed symptoms

Certain tape formulations are susceptible to sticky-shed syndrome, a binder breakdown that can cause squealing, shedding, sticking, and poor tape transport. During playback, the tape may leave residue on guides and heads, slow down, or stop moving altogether. Forcing it through the machine can damage the recording and contaminate the deck.

If a tape shows these symptoms, stop playback. The proper treatment depends on the tape stock, its condition, and the value of the recording. Controlled baking is sometimes used by qualified professionals as a temporary stabilization step for certain polyester-backed tapes, but it is not a universal home remedy. It is not appropriate for every formulation, and incorrect temperature or timing can cause irreversible harm.

Acetate tape presents a different set of risks. It may become brittle, shrunken, or smell strongly of vinegar as the base deteriorates. Trying to tension or rewind a fragile acetate reel like a modern polyester tape can cause breaks. When in doubt, isolate the reel, document its condition, and seek help before attempting transfer.

Maintain the Machine That Touches Your Tape

Even a healthy tape can be damaged by a neglected recorder. Before playback, clean the tape path using materials appropriate for your machine: heads, guides, capstan, pinch roller area, and other contact points should be free of oxide buildup and residue. Follow the deck manufacturer’s guidance, especially around rubber parts, since some solvents can cause damage.

Demagnetize only when needed and with the correct procedure. A poorly used demagnetizer can create problems rather than solve them. More often, the immediate preservation benefit comes from clean heads, correct tape tension, a healthy pinch roller, and transport components that do not scrape or wrinkle tape.

Take time to confirm that the machine is compatible with the reel. Tape width, track format, equalization, speed, reel size, hub type, and recording direction all matter. A 1/4-inch consumer stereo tape, a 1/2-inch multitrack reel, and a 1-inch professional-format tape are not interchangeable. Playing a rare tape on the wrong setup may not physically destroy it, but it can lead to incorrect handling, unnecessary rewinds, or a failed transfer attempt.

Clean after every questionable reel

If a tape sheds oxide or leaves residue, clean the tape path before playing anything else. This protects the next reel and makes it easier to identify whether the issue came from the tape or the deck. Keep notes on problem tapes, including brand, reel size, approximate date, symptoms, and any playback history. That information becomes valuable when deciding how to transfer or treat the recording later.

Digitize Important Recordings, but Preserve the Original

Digitization is one of the most useful preservation actions available, particularly for recordings that are unique, deteriorating, or frequently requested. A high-quality digital transfer reduces the need to replay the original tape and creates a practical access copy for listening, editing, or sharing.

Still, digitization is not a reason to discard the reel. The original tape may contain information that a future transfer system can recover more accurately, and digital files require their own preservation plan. Keep at least two copies of transfer files in separate locations, use clear filenames, and document speed, track format, equalization, date, equipment, and any issues heard during playback.

For valuable recordings, avoid making the first transfer on an unfamiliar or unserviced deck. The transfer chain matters. A properly aligned machine, clean tape path, stable capture setup, and accurate format identification can make a meaningful difference in the result.

Label Clearly and Keep a Basic Inventory

A tape without context loses much of its value. Label the box, not the tape surface, with the title, date, speed, track format, recording direction, and any known technical notes. Use a pencil or archival-safe label system rather than writing aggressively on old cardboard boxes. If a reel already has original notes, photograph or transcribe them before replacing the container.

A simple spreadsheet is enough for many private collections. Record the location of each reel, its condition, whether it has been digitized, and whether playback has been tested. This saves time when you are searching for a particular session or trying to prioritize tapes that need attention.

The best preservation routine is the one you can maintain: stable storage, careful inspection, a clean machine, and a plan for recordings that cannot be replaced. When a tape is rare, damaged, or simply too important to risk, pause before pressing Play. A little patience now may be what keeps that recording available for the next generation of listeners.

BASF 911 Review for Serious Reel-to-Reel Users

A clean reel of BASF 911 can still be a rewarding find: a professional-grade tape built for users who want wide dynamic range, confident tape handling, and a formulation suited to serious recording. But a BASF 911 review has to begin with one fact that matters more than its original specifications: these reels are now vintage media. The condition of the individual tape, its storage history, and your machine’s alignment will decide whether it performs like a studio tape or becomes a preservation project.

BASF 911 earned its reputation because it was made for demanding analog work, not casual voice logging or low-level consumer recording. When a reel is clean, properly stored, and compatible with the recorder, it remains one of the more desirable legacy tape formulations for home studios, collectors, and archives.

BASF 911 review: where this tape fits

BASF 911 is generally encountered as Studio Master 911, a backcoated, high-output professional recording tape. It was designed for high-quality multitrack and stereo recording at professional speeds, especially 15 ips and 30 ips. Most examples are standard-play 1.5 mil tape, valued for the stability and handling that come with a thicker base film.

Its position in the BASF family is important. BASF 911 is commonly regarded as a high-output tape in the class later associated with SM911. It offers substantially more recording headroom than older low-output tapes while avoiding the extreme operating levels associated with the highest-output studio formulations. That makes it a practical choice for machines that were aligned around professional tape standards and for recordists who want strong signal-to-noise performance without pushing every part of the recorder to its limit.

The 1.5 mil base is a major reason many users prefer it for master recordings. It is less prone to stretch than long-play tape, tends to wind with authority, and gives a solid tape pack on a well-maintained transport. The trade-off is running time. A standard 10.5-inch reel of 2,500-foot tape gives roughly 33 minutes per direction at 15 ips, compared with the longer recording time available from thinner 1 mil stock.

Sound character and recording performance

A healthy BASF 911 reel is prized for low noise, strong output, and a composed sound when levels rise. On a properly calibrated deck, it can capture transients with considerably more margin than common consumer tape. That extra margin is particularly useful for percussion, electric guitar, dense mixes, and live recordings where occasional peaks are unavoidable.

It is tempting to describe tape sound in broad terms such as warm or smooth, but BASF 911 does not impose a single personality on every machine. The deck’s heads, electronics, equalization, bias setting, tape speed, and operating level all matter. On one machine, 911 may deliver a firm low end and clean, extended high frequencies. On another, especially a deck aligned for a lower-output formula, it may sound overly bright, compressed, or dull if the record level and bias are not adjusted.

For playback of existing recordings, the tape’s original calibration matters just as much. A reel recorded at elevated operating level may play back louder than expected on a consumer machine. Do not assume that a familiar VU-meter position means the tape was recorded incorrectly. Set playback gain conservatively, listen for audible distortion, and avoid making irreversible changes until you understand what is on the reel.

How much headroom should you expect?

BASF 911 is typically treated as a +6 class professional tape, although nomenclature, documentation, and real-world machine alignment vary across production periods. That designation is useful as a starting point, not as a promise that every reel will behave identically.

If you are recording fresh material, calibrate the actual tape you intend to use. A test reel from the same batch is preferable to basing settings on a label, a forum post, or a modern equivalent. Correct bias and record calibration will have a greater effect on results than small theoretical differences between compatible high-output formulations.

What aging means for BASF 911 today

The strongest argument for BASF 911 is also the reason to inspect it carefully: it was professional media, and many surviving reels were used in studios. A reel may have passed through sessions, edits, storage rooms, or years of unknown environmental conditions. Brand and formulation tell you what the tape was capable of when new. They do not guarantee current condition.

BASF tape has a reputation among many users for good physical stability, but no vintage reel should be assumed trouble-free. Heat, humidity, contamination, poorly adjusted transports, and repeated rewinding can all affect a tape that was originally first-rate. A reel stored in a dry, temperature-stable space is a very different prospect from one found in a garage, basement, or unmarked box.

Before playing a newly acquired reel, inspect the pack under good light. Look for uneven layers, cinching, edge damage, oxide debris, and sections where the tape has loosened or shifted. A professional-looking metal reel does not prove that the tape itself is sound.

During an initial low-risk pass, watch and listen for these warning signs:

  • Squealing, sticking, or a sudden change in tape tension
  • Heavy brown or black deposits collecting on guides and heads
  • Flaking oxide, curled edges, or visible shedding
  • Spoking or air gaps in the tape pack
  • Audible dropouts, intermittent high-frequency loss, or mistracking

If any of these symptoms appear, stop the machine. Do not keep running the reel in the hope that it will clean itself up. Continued playback can damage the recording, foul the tape path, and create a harder restoration problem. Baking is sometimes appropriate for specific binder-related problems, but it is not a universal remedy and should never be a reflexive first step. Identify the problem before applying heat to irreplaceable material.

Machine setup matters more than the label

BASF 911 performs best on a deck that is mechanically healthy and aligned for the tape speed, equalization standard, and operating level you plan to use. This is especially relevant for consumer and prosumer machines that may have been adjusted around lower-output tape decades ago.

For a fresh recording, begin with a cleaned tape path and demagnetized heads where appropriate. Confirm that the pinch roller, capstan, guides, brakes, and reel tables are functioning correctly. Then align the machine using suitable test references and a sacrificial portion of the actual tape stock. Bias should be set by measurement, not by the assumption that all high-output tape shares the same optimum point.

A machine that is underbiased can emphasize distortion and produce an aggressive top end. A machine that is overbiased may sound muted and lose some high-frequency definition. Record level matters too. If the deck cannot supply enough clean current to take advantage of 911’s higher output capability, forcing levels upward will not create more headroom. It will only create distortion in the electronics or on the tape.

For archival playback, use a more cautious approach. Do not erase, record over, splice, or aggressively fast-wind an unknown BASF 911 reel before evaluating it. Confirm the recorded speed and track format, check head alignment, and make a preservation transfer before attempting any cosmetic rewinding or editing. A 1/4-track consumer recording and a 1/2-track professional master may both be on 1/4-inch tape, but they are not interchangeable playback jobs.

BASF 911 versus newer tape choices

For a recordist who wants dependable new tape for ongoing projects, current-production stock has an obvious advantage: known storage history, predictable formulation, and easier calibration support. New tape is usually the sensible choice when a session cannot afford surprises.

BASF 911 remains compelling when you have a verified clean reel, a machine that is set up for it, or a period-correct project where original tape character and format matter. It is also a worthwhile option for users who appreciate its standard-play thickness and professional handling. The deciding factor is not whether old BASF is automatically better than new tape. It is whether that particular reel is healthy enough to justify its use.

For collectors and archivists, recorded BASF 911 may be valuable regardless of whether it is suitable for fresh recording. The goal then is preservation, not extracting maximum performance. A careful playback assessment and transfer can be far more valuable than chasing the last increment of high-frequency response.

Who should buy or use BASF 911?

BASF 911 makes the most sense for experienced reel-to-reel users with a properly maintained deck, especially those working at 15 ips or 30 ips and comfortable with calibration. It is a strong candidate for recording when condition has been verified and when standard-play tape strength is more important than extended run time.

It is less ideal for someone who wants a plug-and-play reel for an unserviced consumer deck. In that situation, a clean machine, known-good tape, and realistic expectations should come before pursuing a specific vintage formulation. Reel to Reel Warehouse customers often find that matching tape condition and format to the machine is more useful than chasing a famous label alone.

A good BASF 911 reel rewards careful handling. Treat it first as a piece of vintage professional media, then as a recording surface, and it can still earn a place on a serious analog machine.

How to Clean Vintage Tape Reels Without Damage

A dusty 10.5-inch metal reel can look like a simple cleanup job until a cloth catches the tape edge, a solvent softens an old label, or moisture reaches the tape pack. To clean vintage tape reels safely, treat the reel and the recorded tape as separate objects with different risks. The goal is not to make every reel look factory-new. It is to remove loose contamination, identify damage, and keep the tape stable for playback, storage, or transfer.

For collectors, recording enthusiasts, and archivists, careful cleaning also tells you something useful about the media itself. A warped flange, sticky residue near the hub, or dust packed into the reel can point to poor storage conditions long before the tape reaches a machine.

Start by Identifying What You Are Cleaning

The first question is whether you are cleaning an empty reel or a reel that still holds tape. Empty reels are generally straightforward, although material and condition still matter. A loaded reel requires a much more conservative approach because the tape pack, exposed tape edges, leader, splice points, and labels can all be damaged by an otherwise harmless cleaning method.

Vintage reels are commonly aluminum, plastic, or a combination of both. Aluminum reels may have painted, anodized, brushed, or bare-metal surfaces. Plastic reels vary widely by age and formulation. Some remain stable for decades, while others become brittle, cloudy, or prone to cracking. Older cardboard or fiberboard reels need the gentlest handling of all and should never be treated like washable plastic.

Before cleaning, inspect the reel under good light. Look for bent flanges, cracks around the hub, loose screws, sharp edges, corrosion, adhesive residue, mold, and labels that are lifting or becoming fragile. If tape is loaded, also check whether the tape pack is even and whether the outer wrap has loosened.

A reel with significant damage is not just a cosmetic issue. A bent flange can scrape tape edges during winding. A cracked hub can fail under tension. If the reel is structurally unsound, move the tape to a known-good reel only when you have the equipment and experience to do so safely.

The Safest Way to Clean Vintage Tape Reels

For most empty metal or stable plastic reels, dry cleaning should be the first step. Use a soft, clean microfiber cloth to lift surface dust from the flanges, hub, and spokes. Work gently, especially around stamped lettering, old decals, and sharp flange edges. A soft natural-bristle brush can help remove dust from corners and around the center hub.

If dry dusting is not enough, lightly dampen a cloth with clean water and wipe the reel surface. The cloth should be barely damp, not wet enough to leave standing moisture. Follow with a dry cloth immediately. This method is appropriate for many unpainted aluminum reels and durable plastic reels, but avoid wet cleaning around paper labels, adhesive-backed inventory stickers, and cardboard components.

For stubborn grime on a bare metal reel, a small amount of mild dish soap diluted in water can be used on the cloth, followed by a second cloth dampened only with water and then a full dry wipe. Keep moisture away from seams, hardware, labels, and any tape still on the reel. Never soak a vintage reel, submerge it, or spray cleaner directly onto it.

Cleaning products should be chosen cautiously. Household glass cleaners, abrasive powders, furniture polish, acetone, and strong solvents can discolor finishes, cloud plastic, strip printed markings, or leave residues. Isopropyl alcohol may be useful for certain bare metal surfaces, but it is not a universal reel cleaner. It can affect some plastics, coatings, inks, adhesives, and labels. Test any cleaner on a hidden area first, and do not use alcohol near a loaded tape pack.

Cleaning a Reel That Still Has Tape on It

A loaded reel should usually be cleaned only on its exposed surfaces. Dust the outer flange and hub with a soft cloth or brush while keeping your hand away from the tape edges. Do not wipe across the outer tape wrap, even if it looks dusty. A cloth can snag the tape edge or press debris into the pack.

If loose dust is visible on the tape pack, do not use compressed air. Air pressure can lift the outer wrap, drive particles deeper between layers, and create uneven tension. It is better to leave minor dust alone than to create a winding problem that damages the recording.

When the tape must be played or transferred, clean the tape path and machine components first. Properly cleaned guides, heads, rollers, and capstan surfaces do more to protect the tape than aggressive cleaning of the reel itself. If the tape shows mold, shedding, sticky residue, or a distorted pack, stop and assess its condition before attempting playback.

Labels, Writing, and Historical Value

A handwritten box label or a faded reel label may be more valuable than the reel’s cosmetic condition. It can identify a session, recording date, tape speed, track format, performer, or previous owner. Never scrub labels in an attempt to make them look cleaner.

For loose surface dust, use a dry, soft brush with minimal pressure. If a label is peeling, do not reattach it with ordinary household tape or glue. Adhesives can stain paper, migrate over time, and make future archival work harder. Photograph the label and record the information before moving or re-housing the tape.

The same caution applies to writing on reel flanges. Marker notes such as “15 ips,” “2-track,” or “master” may be critical technical information. A polished-looking reel with erased history is not an improvement.

When Grime Signals a Bigger Tape Problem

Not every dirty reel needs professional attention, but some conditions call for more than basic cleaning. Mold is one of the clearest examples. Fuzzy, powdery, or spotty growth can be a health concern and may spread to nearby media. Isolate the reel from your collection, avoid playing it, and do not brush mold indoors where spores can become airborne.

Sticky or oily residue around the tape pack can indicate adhesive failure, deteriorating leader tape, poor past storage, or tape binder problems. A sour, musty, or vinegar-like odor also deserves attention. Smell alone does not diagnose a tape formulation, but it can signal that the reel should be inspected before playback.

White oxidation on aluminum, corrosion on metal hardware, or sticky deposits on the hub can often be cleaned from an empty reel. However, if the contamination reaches the tape itself, the priority changes from appearance to preservation. Do not assume a tape can be safely played just because the reel has cleaned up well.

Storage After Cleaning Vintage Tape Reels

Once a reel is clean and fully dry, store it vertically in a properly sized box or protective case. The tape should be evenly wound, with the tape pack supported by an intact reel and protected from dust. Keep reels in a stable, moderate environment away from direct sunlight, attics, basements, exterior walls, and heating or cooling vents.

Avoid stacking heavy reels flat for long periods, particularly plastic reels and reels with thin flanges. Weight and heat can contribute to warping. If you use NAB hubs or adapters, inspect them regularly for burrs, cracks, or loose parts that could damage the reel’s center opening.

For an empty reel intended for reuse, make one final pass around the flange edge and hub. You are checking for anything that could contact tape during winding: grit, adhesive, corrosion, a raised screw, or a sharp burr. The reel does not need to be visually perfect. It needs to run true, support the tape pack, and present a smooth path for the tape.

A Practical Standard for Collectors and Archivists

The right level of cleaning depends on the reel’s purpose. A display reel can tolerate a little more cosmetic attention than a documented master tape. A used take-up reel needs to be clean and mechanically sound, while a rare recording may be best left largely untouched until it can be evaluated for transfer.

When in doubt, preserve information and stability over appearance. A clean reel is useful, but a reel that retains its original labels, runs without scraping, and protects the tape inside is the better result. Handle each reel as part of the recording system, not just as a piece of vintage hardware.

Quantegy 456 Review for Reel-to-Reel Recordists

A well-preserved reel of Quantegy 456 can still make a properly aligned tape machine feel like a serious recording tool. It is not merely a nostalgic formula. In this Quantegy 456 review, the reason for its lasting reputation is clear: 456 gave engineers higher operating levels, low noise, dependable handling, and a sound that suited everything from multitrack rock sessions to two-track masters.

That reputation also needs context. Quantegy 456 is discontinued, and the condition of any surviving reel matters as much as the label on the box. A clean, stable reel can be highly useful. A reel with binder breakdown can foul heads, squeal, and put a recording at risk. Buying and using 456 well means understanding both sides of the story.

What Quantegy 456 Was Designed to Do

Quantegy 456 was a 1.5-mil, back-coated, high-output studio tape. It carried forward the well-known Ampex 456 formulation and became a common choice in professional recording rooms during the analog era. The 1.5-mil base gave it the physical confidence many engineers wanted for regular use, while the back coating improved winding and pack stability on properly maintained machines.

Its defining specification was its high-output character. 456 was commonly operated at +6 dB relative to 185 nWb/m, assuming the recorder was aligned for the tape. Put simply, it could accept more level before saturation than older standard-output formulations. That extra headroom helped reduce the audibility of tape hiss and let engineers record hotter signals without treating every peak as an emergency.

For many users, 456 became a practical middle ground. It did not ask for the very highest-performance transport or electronics to deliver a satisfying result, yet it responded well to careful calibration. It was at home on quarter-inch stereo decks, half-inch 8-track machines, one-inch multitracks, and larger professional formats when the machine and tape width matched.

Quantegy 456 Review: Sound and Recording Character

No tape formula has one universal sound independent of the recorder. Head condition, tape path, bias, equalization, speed, electronics, and recording level all shape the result. Still, 456 has a recognizable working character when used on a healthy, aligned machine.

At sensible levels, it is relatively clear and controlled for a vintage analog formulation. The low end can feel firm, transients retain useful definition, and the midrange has enough density to make vocals, guitars, drums, and mixes feel finished without becoming dull. Push it harder and the tape’s compression becomes part of the aesthetic. Peaks round off gradually, harmonics become more apparent, and a track can gain the cohesive thickness many recordists seek from tape.

That does not mean 456 is automatically flattering. If a deck is biased incorrectly or set too hot, the top end may close in and cymbals can lose their natural openness. On a machine with worn heads or poor azimuth, a good reel will not restore detail that the recorder cannot reproduce. The familiar “tape warmth” is most convincing when the fundamentals are right: clean heads, stable transport, correct alignment, and a tape path free of oxide buildup.

At 15 ips, 456 is especially comfortable for serious stereo work and multitrack recording. At 7.5 ips, it can still produce pleasing results, particularly for home recording and program material where extended top-end response is not the only priority. Slower speeds bring more tape character, but they also bring more audible noise, greater head-bump effects, and less high-frequency extension. The better choice depends on the project rather than a blanket rule.

Calibration Is Not Optional

A machine set up for a lower-output tape should not simply be loaded with 456 and assumed to be ready. The deck may record, but it will not necessarily deliver the formulation’s intended performance. Bias and record level are the critical adjustments, with equalization, reproduce alignment, and azimuth also deserving attention.

The proper procedure is to align the recorder according to its service documentation and the tape formulation being used. Many machines were routinely aligned for +6 tape, but not all were, and prior owners may have changed the setup. A calibrated test tape and appropriate instruments remain the correct tools for archival or professional work.

For an enthusiast making noncritical recordings, a practical test can reveal whether the deck is in the right neighborhood. Record music with demanding high-frequency content and strong transients, then compare source and playback while watching for premature dullness, distortion, or unstable level. This is not a substitute for full alignment, but it can prevent the common mistake of judging the tape when the machine is the real limitation.

456 also rewards attention to recording level. Running every signal as hot as possible may create attractive compression on a snare drum or electric guitar, but it may be the wrong approach for a delicate acoustic recording or a final master that needs maximum openness. The usable operating window is broad, not limitless.

The Major Caveat: Sticky-Shed Syndrome

Any honest review of Quantegy 456 must address sticky-shed syndrome. Some Ampex and Quantegy back-coated tapes from particular production eras are susceptible to moisture-related binder hydrolysis. The binder absorbs moisture and begins to break down, causing the tape to become sticky during playback or winding.

Typical warning signs include squealing, slowed or stopped tape travel, uneven winding, a gummy residue on guides and heads, oxide shedding, or a machine that suddenly requires frequent cleaning. Do not keep forcing a suspect reel through the transport. Continued playback can damage the recording, contaminate the tape path, and strain the machine.

The presence of a 456 label does not tell you the whole story. Storage history is decisive. A reel kept in a stable, cool, low-humidity environment may be usable, while another from the same approximate period may be compromised. Sealed packaging can be encouraging, but it is not an absolute guarantee of tape condition.

Controlled low-temperature dehydration, commonly called tape baking, can temporarily restore playability to some affected polyester-base tapes long enough for transfer. It is a recovery procedure, not a cure, and it should be approached carefully. Valuable masters, irreplaceable recordings, and uncertain tape types are best handled by an experienced transfer or preservation service. Never use a suspect reel as a casual blank for a new recording session.

Is 456 Still a Smart Choice?

For recording new work, the answer depends on what is available and what you expect from the reel. A verified, stable reel of 456 can be an excellent choice for users who want its period-correct high-output performance and have a machine aligned for it. It is particularly appealing for owners of classic multitracks and stereo decks that spent their working lives with +6 formulations.

For archival playback, condition comes first. The tape may contain a valuable recording, but its formulation does not make it safe to run. Inspect the reel, check the pack, look for residue or edge damage, and clean the machine before and after any evaluation. If there is doubt, stop early rather than gambling with the only copy.

For routine recording, modern high-output tape may be the more predictable path when consistent fresh stock is available. A current-production reel avoids much of the uncertainty that comes with decades-old media, even if its exact sonic behavior differs from 456. There is no single winner here. The right tape is the one that is physically sound, compatible with your machine, and appropriate for the recording you are trying to make.

What to Check Before Loading a Reel

Before putting any vintage 456 reel on a deck, examine the tape pack for obvious damage, telescoping, popped strands, or debris. Turn the reel gently by hand and watch for abnormal resistance. Confirm that the leader is secure and that the reel has been stored in a clean box away from obvious moisture or heat exposure.

Then make the first pass short and cautious. Listen for squeal and watch the tape travel. If the tape sheds heavily or leaves a sticky deposit, stop immediately and clean the tape path. A few minutes of careful assessment can save a machine from contamination and prevent unnecessary damage to a recording.

Quantegy 456 earned its standing because it made high-level analog recording practical, musical, and repeatable. Treat each surviving reel as an individual piece of recording media, not a guaranteed commodity, and it can still show exactly why so many engineers trusted the formula.

Refurbished Reel to Reel Tapes for Sale

The Widest Range of Reel to Reel Tapes Available Worldwide

90 Day No-Fuss Replacement Guarantee If you find a problem with the tapes or are not satisfied for any reason, we’ll send you a replacement tape.

Browse the Shop

Subscribe to Our Newsletter

Get updates and Reel-to-Reel News in your inbox.

Have a question about reel-to-reel tapes?

Send us your reel-to-reel questions, comments and feedback about the website, or inquire about tapes for sale. Don’t see the tape you need in our shop? Let us know what you’re looking for, and we’ll try to find it for you.

Ask a Question